Identity and Access Management
Platform Roles
Roles are mutually exclusive. All users must be assigned one of the following roles.
| Role Name | Description |
|---|---|
Administrator | Full access to all Zyston Platform capabilities |
Report Viewer | Read access to Zyston CyberCAST assessment reports and associated findings |
Single Sign-On ("SSO")
The Zyston CyberCAST Platform can be configured to support user logins via the web portal using an identity provider supporting SAML v2.
When configured for SSO, the platform will automatically create new users for any SAML assertion received from your identity provider. This allows you to control access to the Zyston CyberCAST Portal entirely from your organization's identity and access management solution.
SSO Configuration Checklist
-
Ensure you have the
Administratorrole assigned to your Zyston Platform user -
Configure an application in your Identity Provider with the following parameters:
- Application Name:
Zyston CyberCAST Portal - Application Identifier:
https://cybercast.zyston.com - SAML Assertion Consumer Service URL:
https://cybercast.zyston.com/sso/saml/acs
- Application Name:
- Obtain the SAML metadata URL generated by your identity provider
- Create a new SAML SSO provider in the Zyston Portal using the metadata URL
User Management with SSO Configured
Once you have configured an SSO Identity Provider, existing users will no longer be able to login with their password and two-factor authentication code. All new logins must go through your identity provider.
Users with the Administrator role may continue to login through a special URL if it should become necessary to login without the use of SSO. For example, in the event you need to modify your SSO configuration.
https://cybercast.zyston.com/admin-bypass-sso
SSO Identity Provider Support
Any identity provider supporting SAML v2 should be configurable to work with the Zyston Platform. In particular, we support and have configuration examples for:
SSO Configuration Example: Microsoft Azure
Step 1: Create a new Enterprise Application in the Azure Active Directory Portal
-
Within the Azure AD portal, select the
Enterprise Applicationsmenu item from the left-hand menu -
Click the
New applicationbutton on the button bar at the top of the screen -
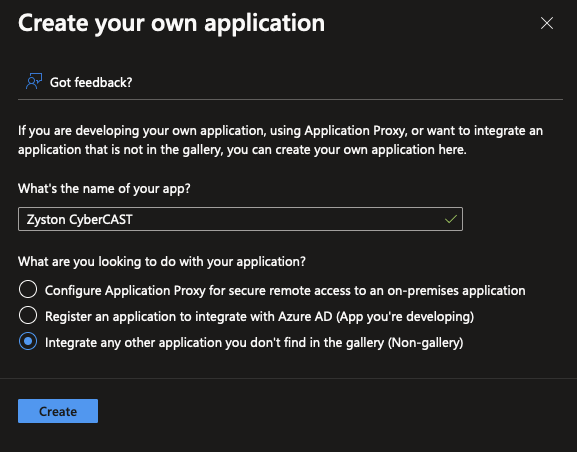
Click the
Create your own applicationbutton at the top of the next screen
Step 2: Provide a Descriptive Name for the Application
-
Set the Application Name to
Zyston Cybercast -
Click
Createat the bottom of the screen
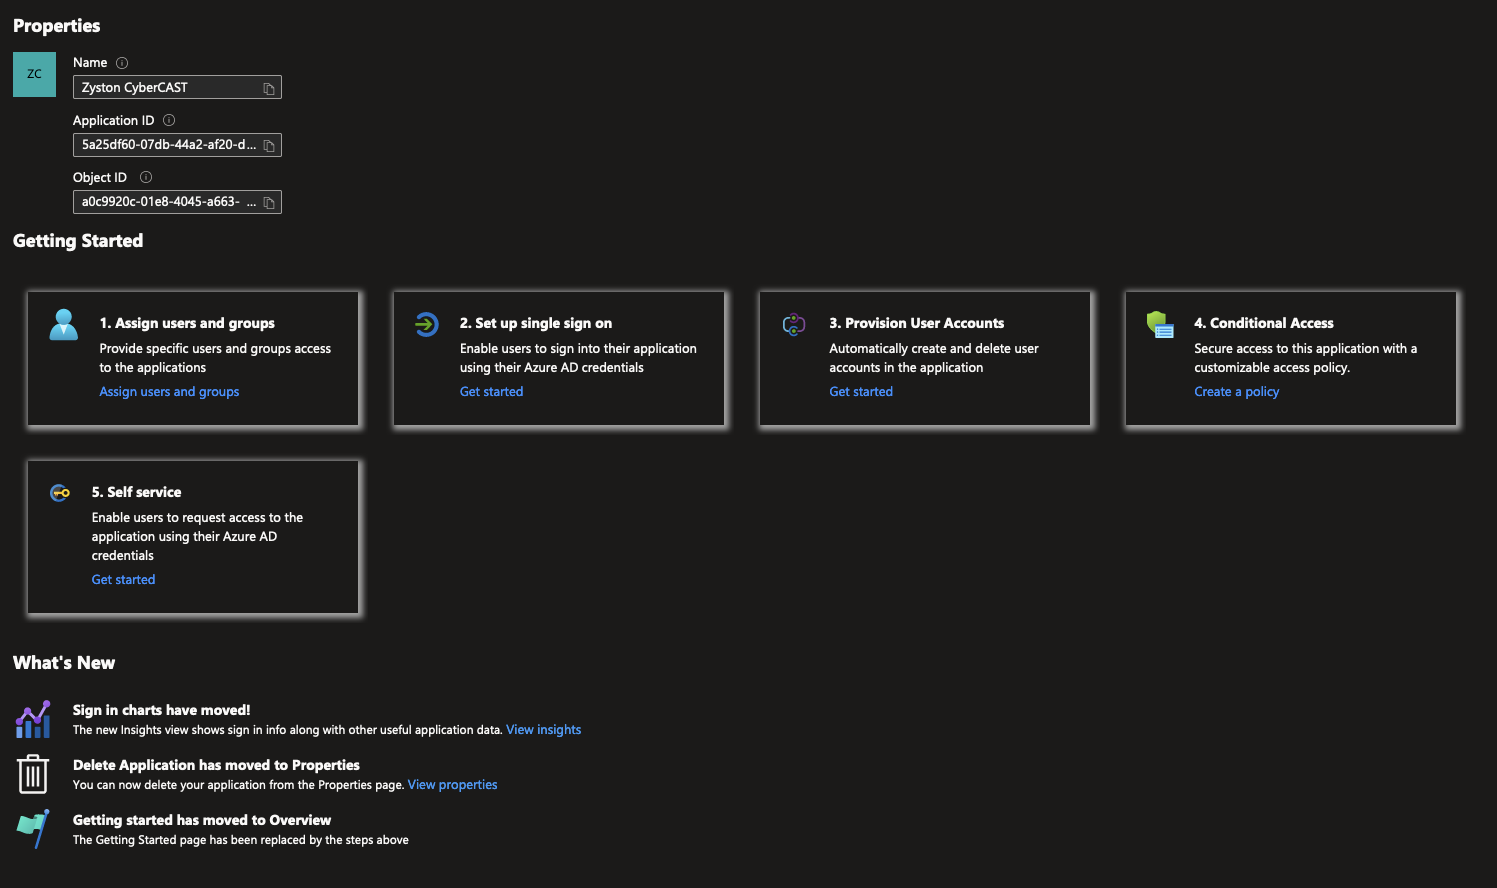
Step 3: Configure the Single Sign-On Settings
-
Click
Set up single sign on
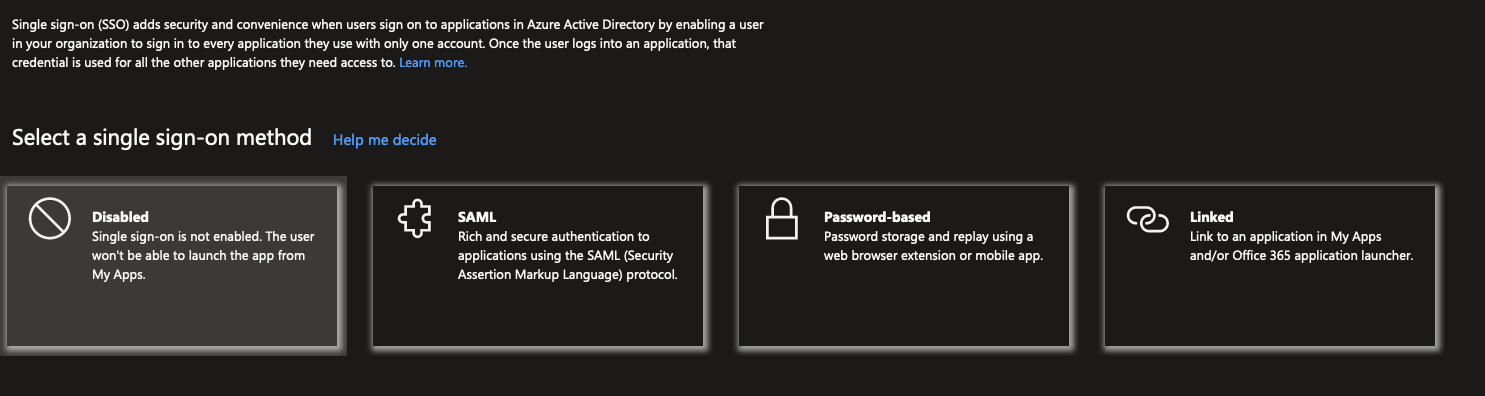
Step 4: Select SAML Sign-On Method
-
Click
SAML
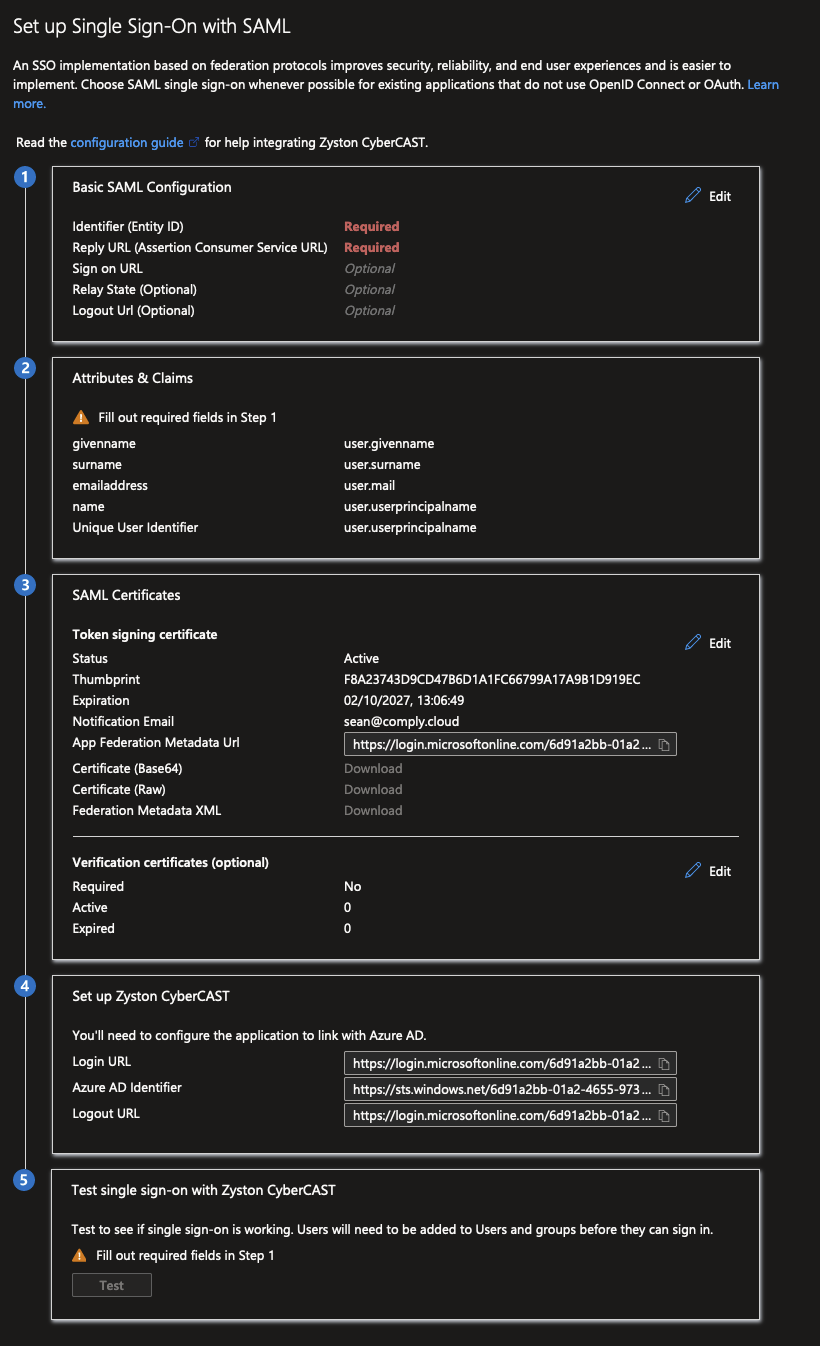
Step 5: Provide SAML Configuration
-
Click
Editin theBasic SAML Configurationsection -
Click
Add Identifierand enterhttps://cybercast.zyston.com -
Enter
https://cybercast.zyston.com/sso/saml/acsin theSign On URLfield -
Click
Save

Step 6: Capture the SAML Metadata URL
-
Copy the
App Federation Metadata URLin theSAML Certificatessection
Step 6: Enter the Metadata URL in the Zyston CyberCAST Portal
- Navigate to Settings
-
Click
Configure SSO - Enter the metadata URL copied in the previous step
-
Click
Continue
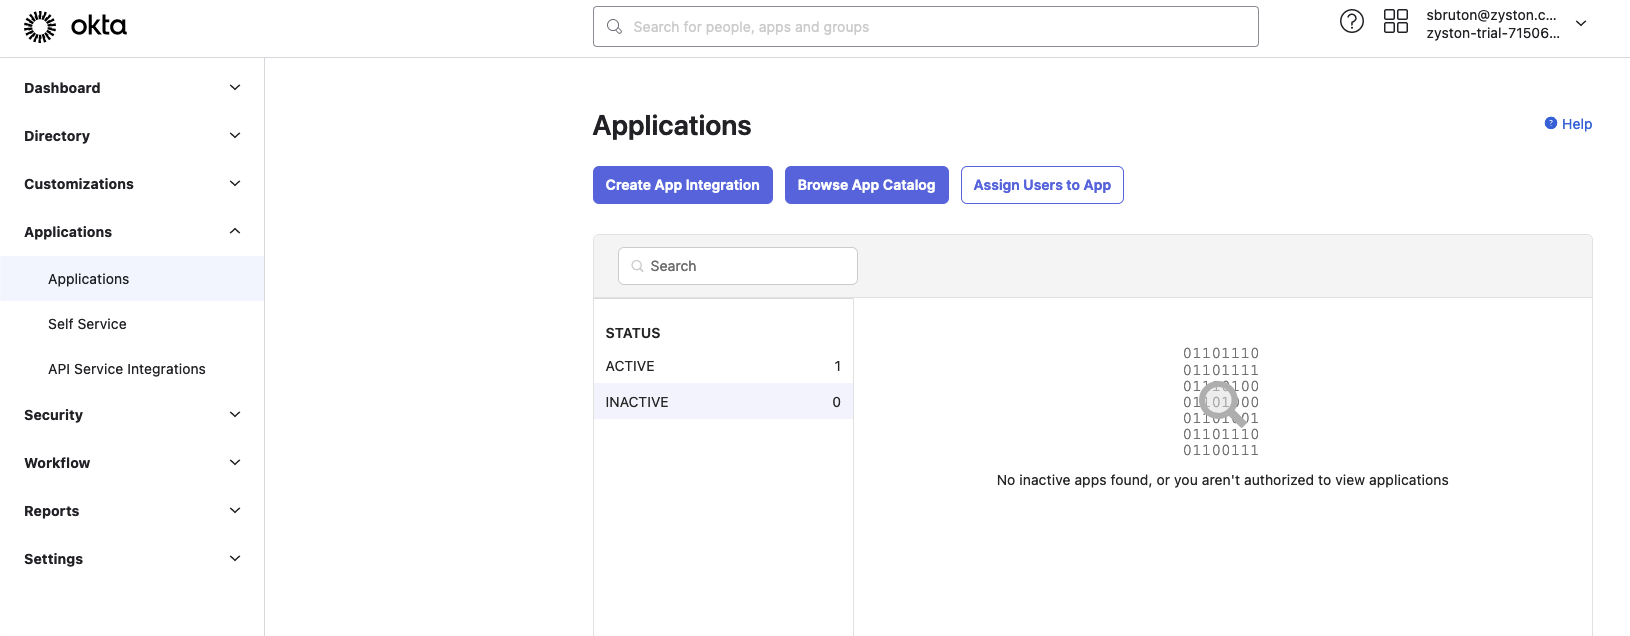
SSO Configuration Example: Okta Workforce
Step 1: Create a new Application in the Okta Admin Portal
-
Within the Okta Admin portal, select the
Applicationsmenu item from the left-hand menu -
Click the blue
Create App Integrationbutton
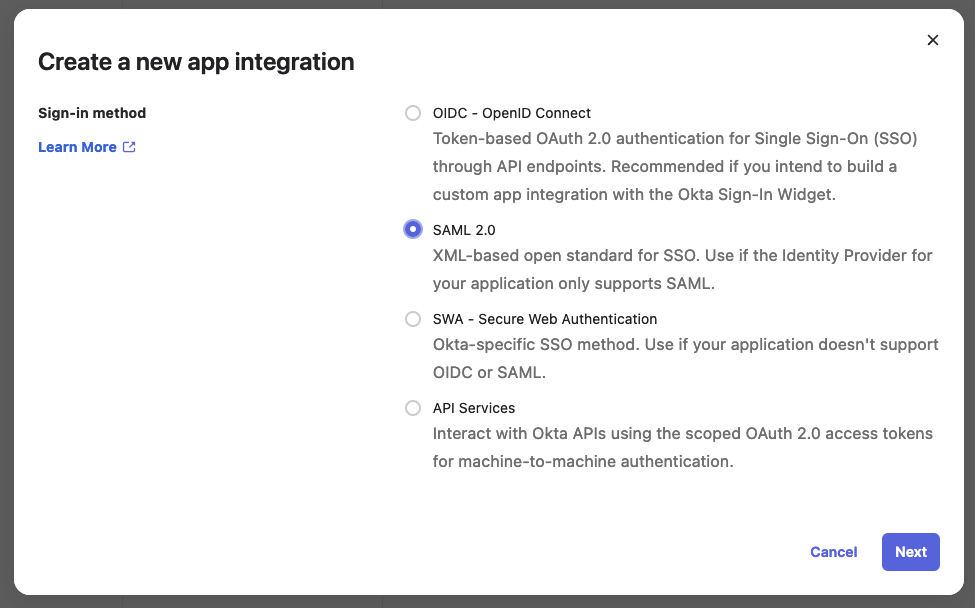
Step 2: Select the Sign-In Method
-
Select
SAML 2.0as the sign-in method -
Click
Next
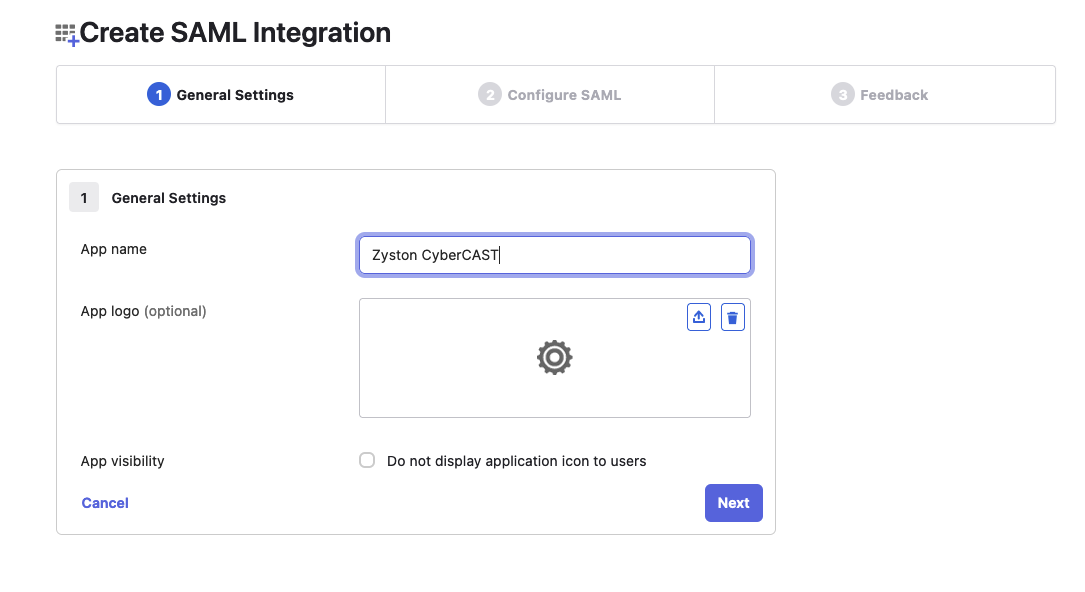
Step 3: Provide a Descriptive Name for the Application
-
Set the Application Name to
Zyston Cybercast -
Click
Next
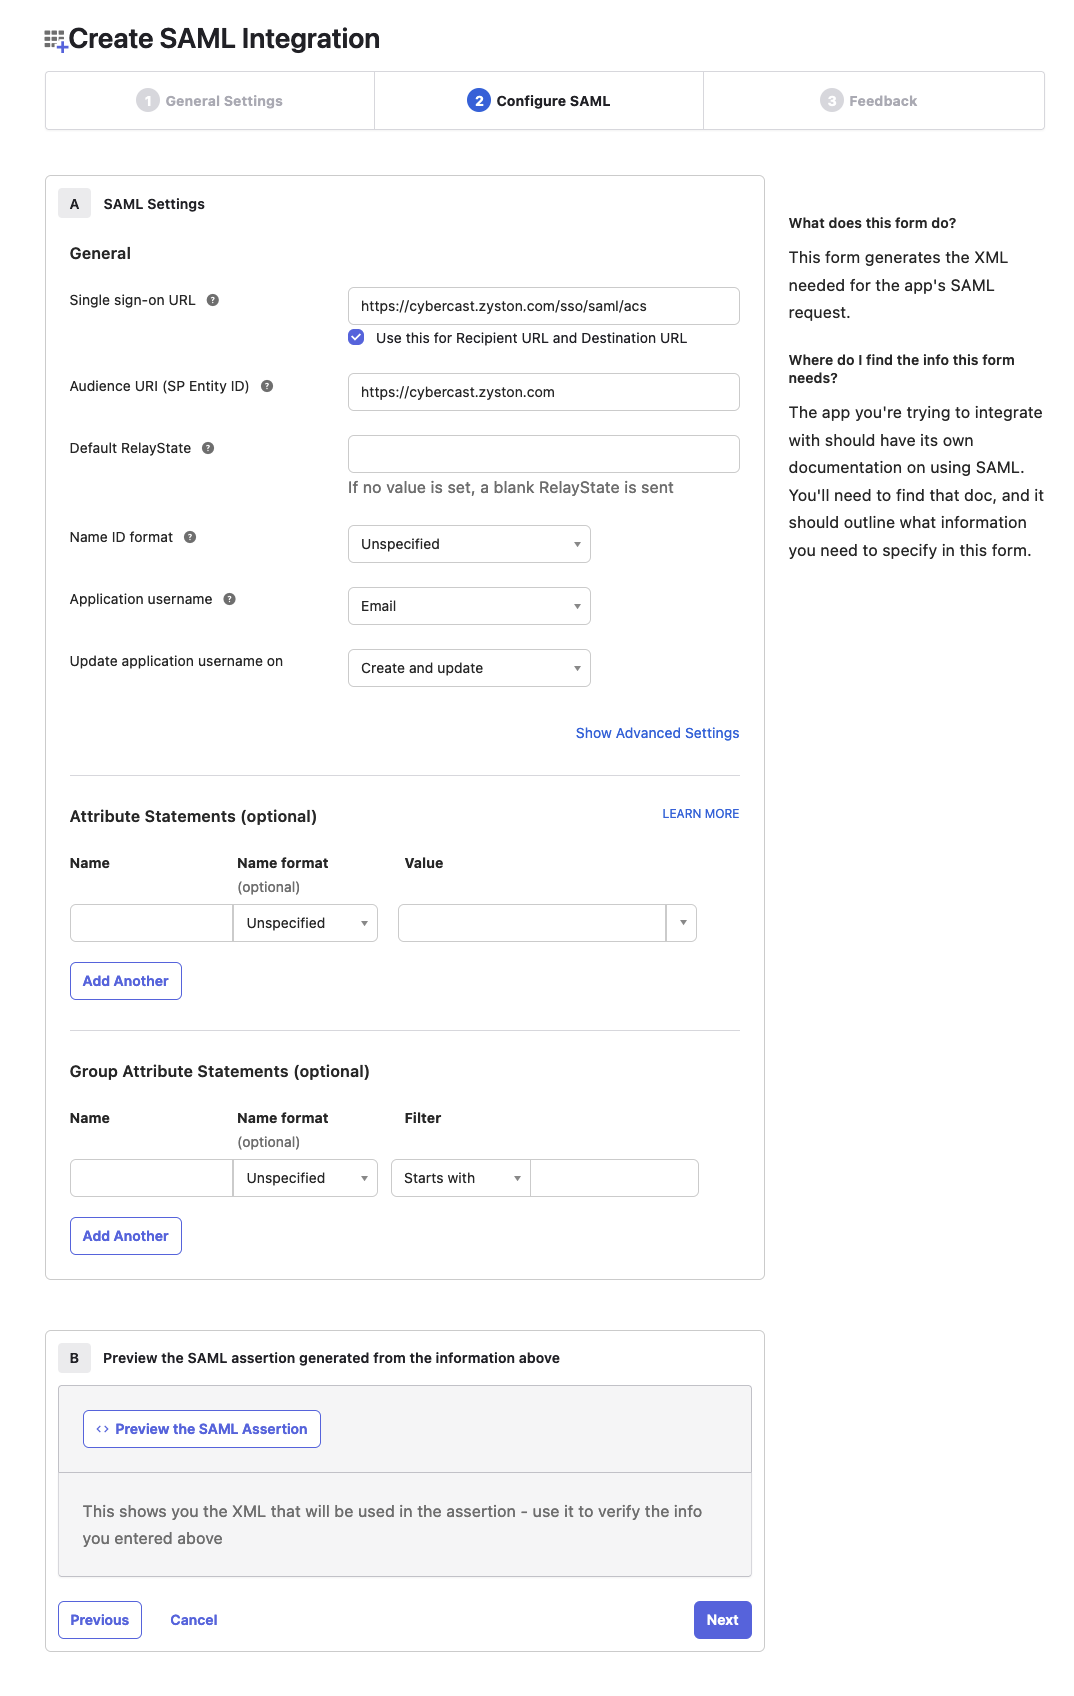
Step 4: Configure the Single Sign-On Settings
-
Set the Single Sign-On URL to
https://cybercast.zyston.com/sso/saml/acs -
Set the Audience URI to
https://cybercast.zyston.com -
Set the Application Username to
Email -
Click
Next
Step 5: Capture the SAML Metadata URL
- Copy the Metadata URL provided by Okta

Step 6: Enter the Metadata URL in the Zyston CyberCAST Portal
- Navigate to Settings
-
Click
Configure SSO - Enter the metadata URL copied in the previous step
-
Click
Continue
How to Configure Office 365 to Support Zyston Office 365 Monitoring Services
Background
Zyston uses a proprietary scanning platform to periodically scan Office 365 environments for subscribers to the Office 365 Monitoring Services. Best practices for Office 365 stipulate that two-factor identification (2FA) be employed on Office 365. Because Microsoft’s 2FA implementation is specifically designed to prevent being impersonated by machine automation, an exclusion must be implemented to allow the scanner to authenticate so it may scan the environment.
This involves placing the IP address of the scanning platform on a list of hosts that are allowed to authenticate to the environment without 2FA. This does not mean that 2FA is disabled, it merely means that 2FA will not be required on authentication attempts from that one host.
Instructions
Note: Click on any image to embiggen.
Step 1: Sign into your Office 365 environment using an administrator account.**
Step 2: Navigate to the configuration page for Multi-Factor Authentication Service settings.**
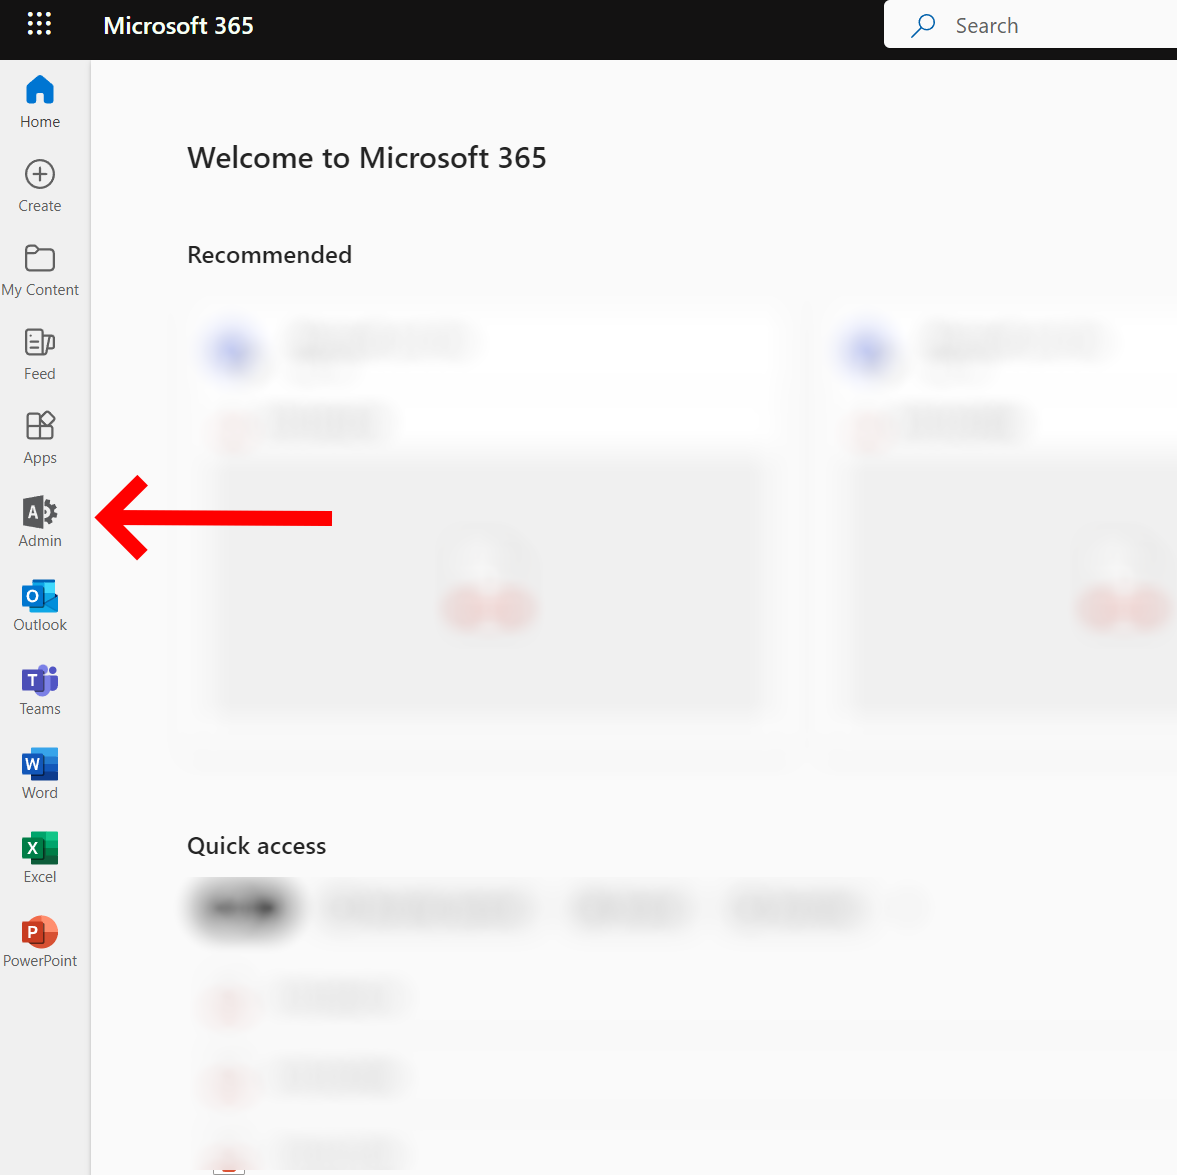
Navigate to the Admin applet.
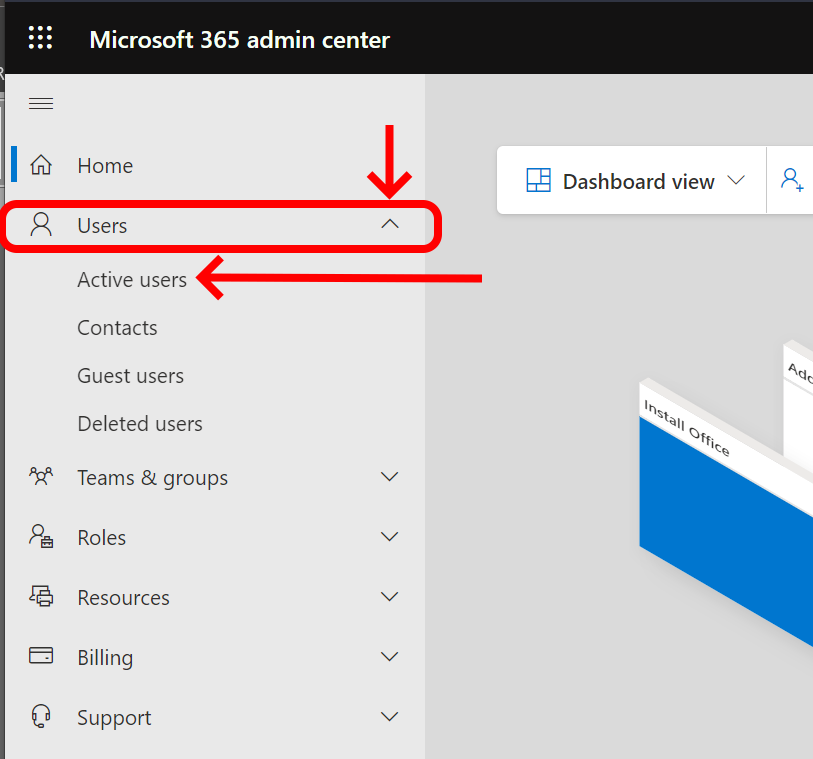
Navigate to Active Users.
(Note: It may be necessary to expand your menus in order to see this option.)
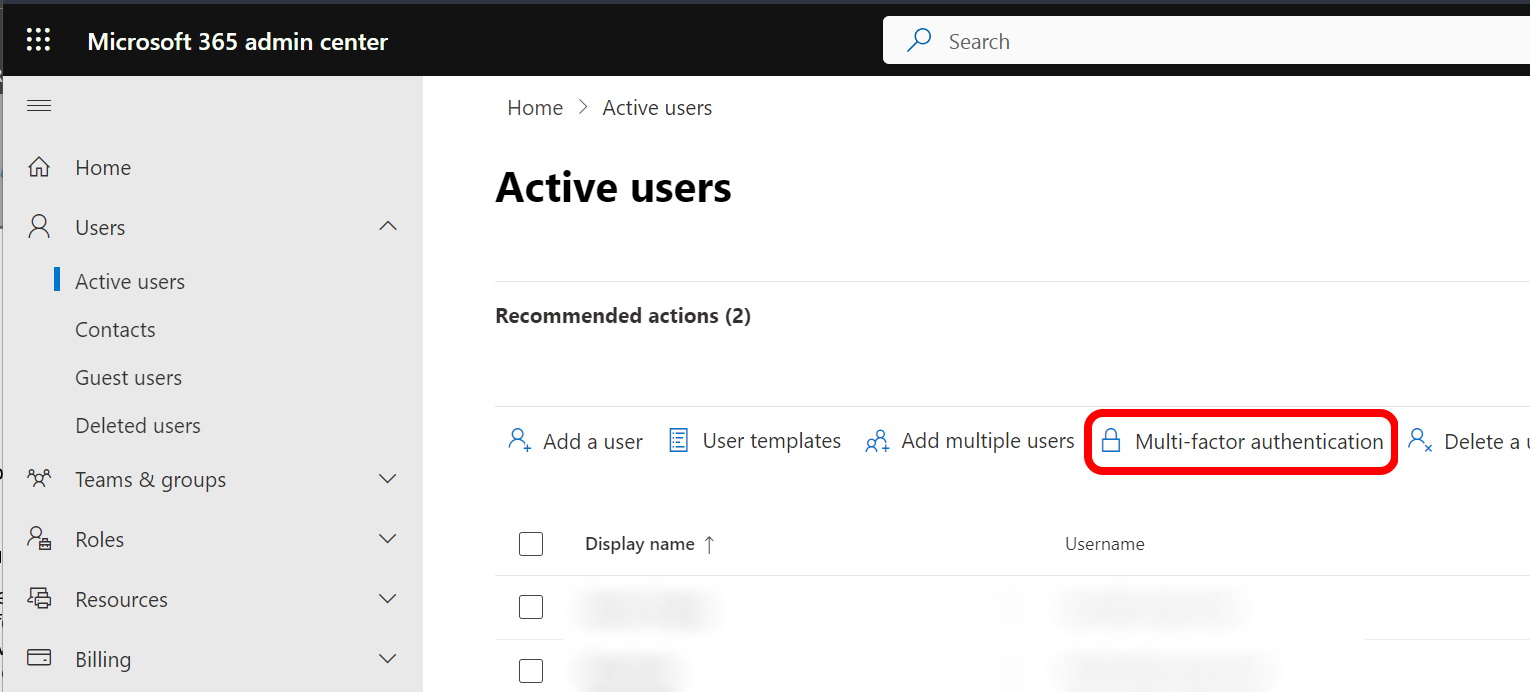
Navigate to Multi-Factor Settings.
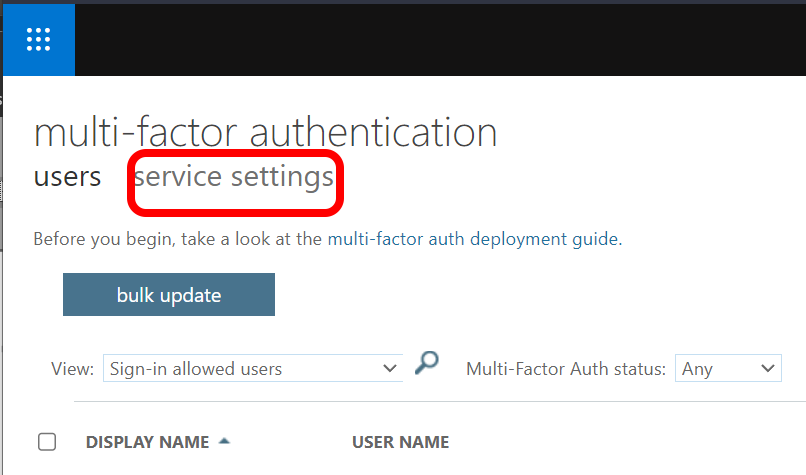
Open the Multi-Factor Authentication Service Configuration page.
Step 3: Add the Zyston scanning host IP address to the list of exclusions.
When the configuration page appears, you will see a large field under “Trusted IPs.” There may or may not already be items in this field. Do not disturb anything already in that list. Add a new line to the end of the list:
20.64.112.99/32
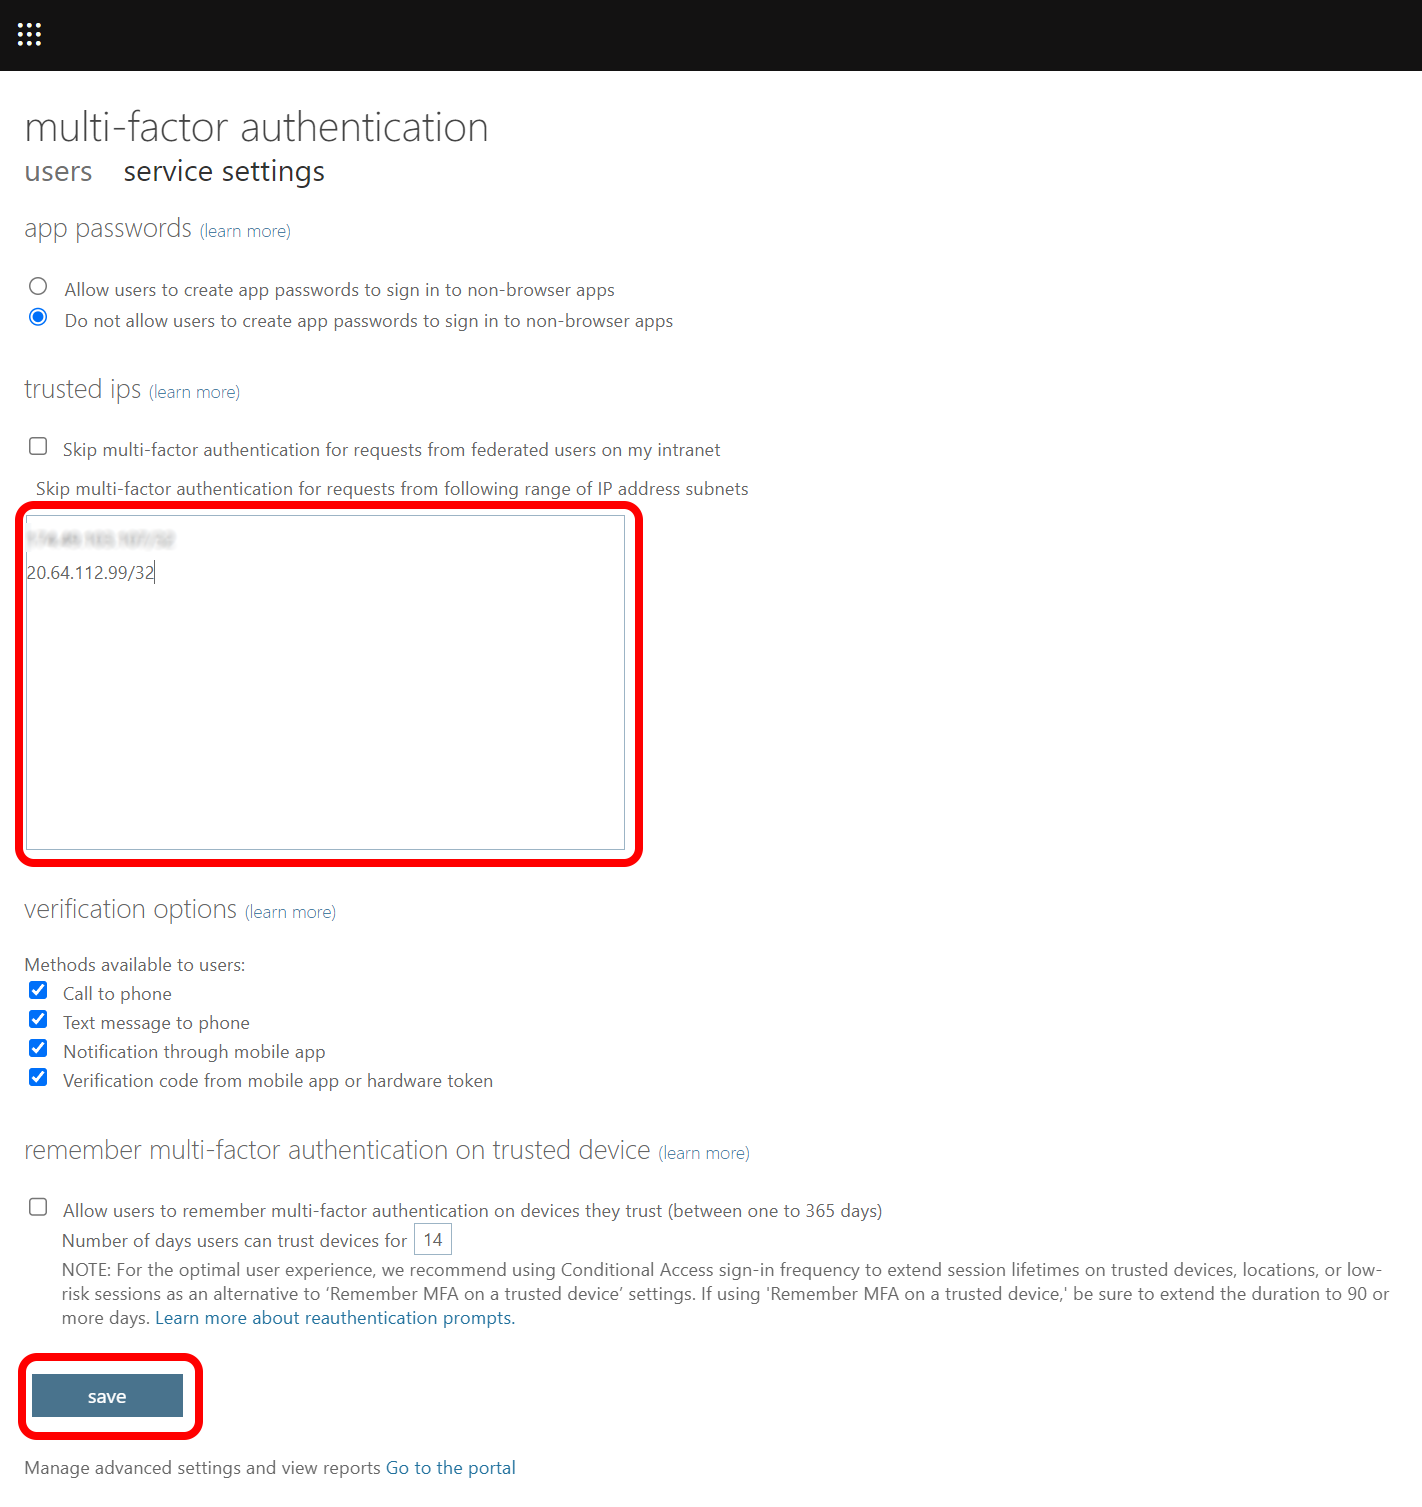
Save your changes Click "Save" at the bottom of the page. This completes the configuration.
Copyright 2022-2023, Zyston, LLC | 13355 Noel Road, Suite 510 | Dallas, TX 75240